The Problem with Paper-Based Inspections
To understand the benefits of digital quality inspections in casting we need to first look at the paper-based alternative. Most foundries, whether investment casting, sand casting, die casting or permanent mold, perform visual inspections of cast parts throughout the production process. These inspections could take place in Shake-Out, Finishing, FPI, X-Ray, Final or at other Quality Gates.
Wherever the inspections happen, paper forms or simplistic in-house made software is often used to record defects and produce reports.
There will always be a lag time between when defects are produced and detected. However, the additional lag time to react associated with manually recording data and keypunching into Excel or a similar program to analyze trends or spot ongoing problems adds to your cost. Non- conforming parts with an expensive price tag can easily build up in your WIP.
The Benefits of Digital Quality in Casting
|
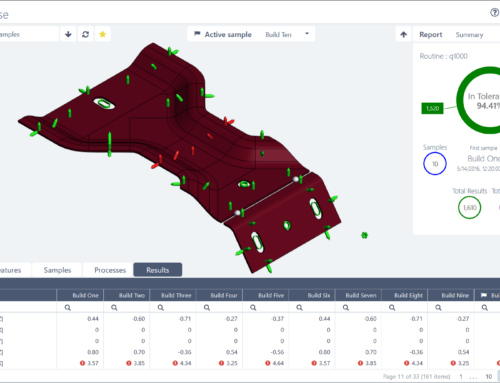
To reduce lag time, and to get the full value out of the data being recorded, you need to perform a digital transformation of your quality processes which will eliminate the paper “tic” sheets associated with the manual recording of data. With digital quality inspections in casting, inspectors can enter defects onto an image or 3D CAD model of your part, noting the location and type of defect together with any related information that can aid repair or analysis. Repairs and rework can then be recorded using the same image or model. A digital quality solution also allows you to integrate your inspection processes with your repair processes. Repairs and rework performed in finishing, weld and blend or other similar process steps can be recorded using the same process in the same system. This provides standardisation and places all inspections, repairs and analysis in a closed-loop quality management system. |
|
Real-Time Analysis
With a digital quality solution, data is available for analysis in real-time. You can analyse data by part number, shift, hour, cavity and other factors to help you identify root cause and reduce repetitive defects.
If your parts are serialized you’ll have an in-depth “digital record” of all inspection data for a given unit, including time and date stamp of inspection, inspector or repair person ID and other critical information often required by customers. Julian dates, cavity numbers, lot numbers and other info could also be recorded automatically. This is data that a paper-based solution either can’t provide or can only provide with limited detail long after the information is truly useful.
With a digital quality solution, aggregated reports can instantly identify high defect producing parts and frequently occurring defect types. You can use real-time defect maps, weld maps and concentration diagrams to tell your tooling and processing engineers where your porosity, shrink, flash, shorts and other defects are occurring so that appropriate process improvements can be made.


